One of the reasons a lot of people downgraded from Windows 10 back to Windows 7 is the excessive data usage that seems hard to control. Unlike previous versions of Windows, Windows 10 seem to consume more data. People with unlimited Internet subscription might not notice, but when you have to manage a 10GB data bundle for the whole month, this becomes a major headache.
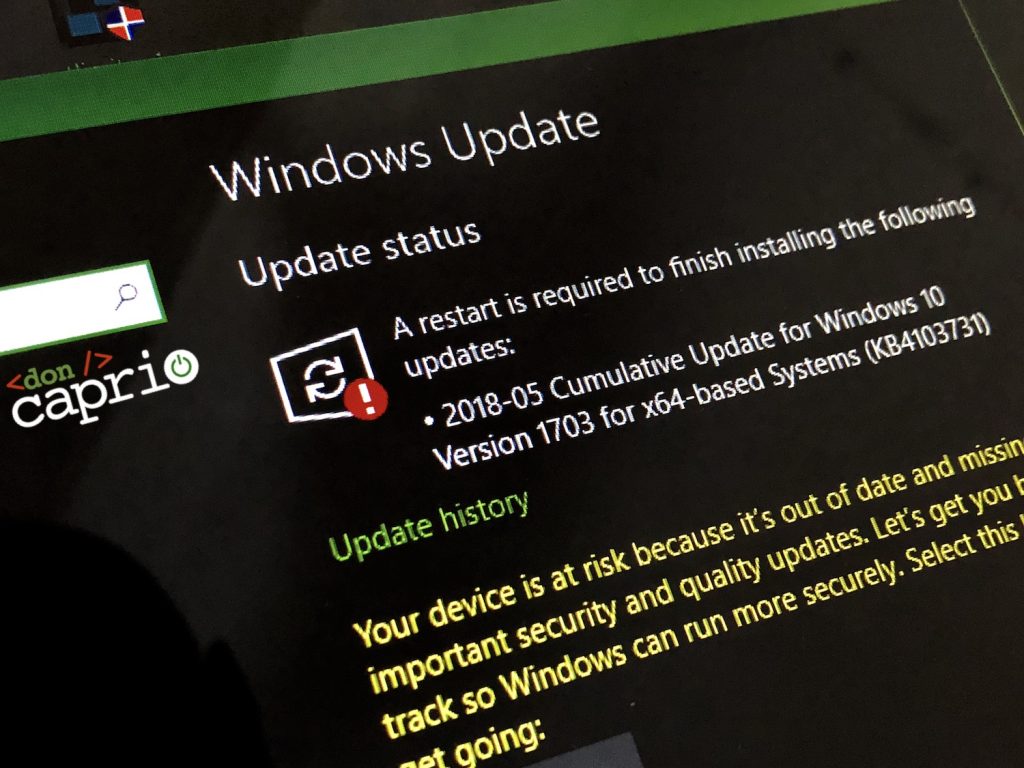
From my experience, simply blocking Windows update doesn’t seem to completely fix this issue. To effective stop Windows 10 from draining your data bundle, you might want to follow these 4 tips:
- Set your connection as metered
- Disable P2P update
- Block Windows update
- Install NetLimiter
Setting connection as metered
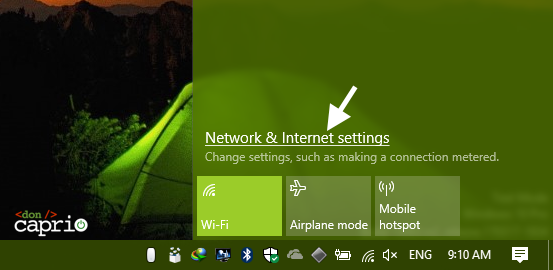
Since you’re not using an unlimited Internet plan, you should let Windows 10 know that your connection is a metered one. Microsoft lets you adjust the connection settings and set any connection as metered.
With this done, Windows should not use that particular connection for updates and other activities that will deeply eat into your allocated bandwidth. To do this,
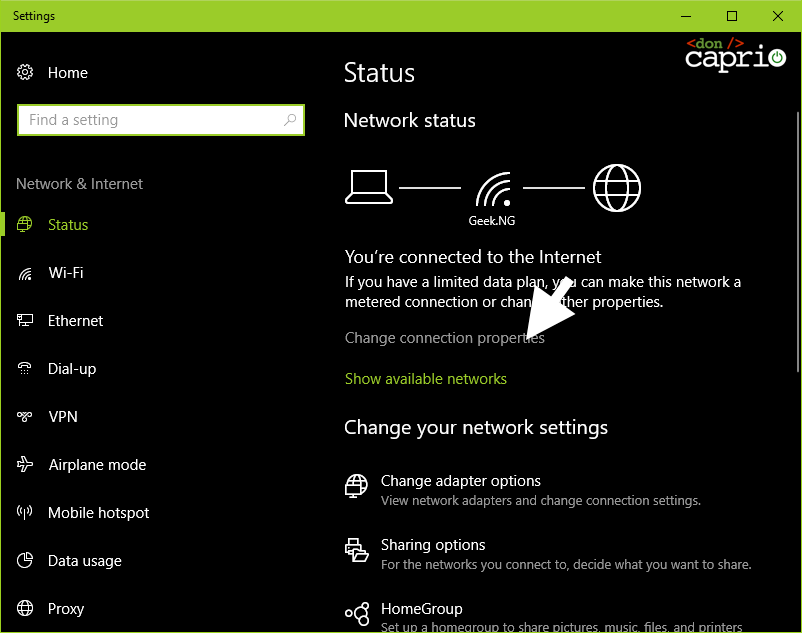
1. Click the connection icon on the taskbar and then select Network & Internet Settings.
2. Click on Connection properties.
3. Toggle on Set as metered connection.
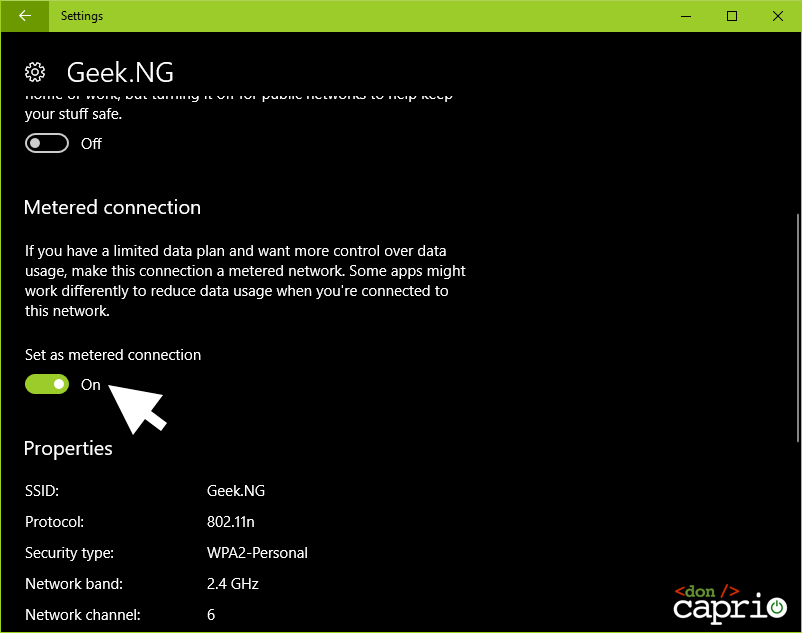
Note that you should do this for every new internet connection. For instance, if you’ve already set your mobile WiFi router as a metered connection, you should also repeat this step if you ever connect your phone as a WiFi hotspot.
Disable P2P update on Windows 10
To deliver Windows updates faster globally, Microsoft enabled P2P (peer-to-peer) Windows update on Windows 10. This simply means another user with a Windows 10 computer could download updates from your own computer instead of getting it directly from Microsoft. It’s more or less just like how torrents work. If you’re on a limited internet plan, this isn’t in your best interest and you should disable this feature.
Follow these steps to disable P2P update:
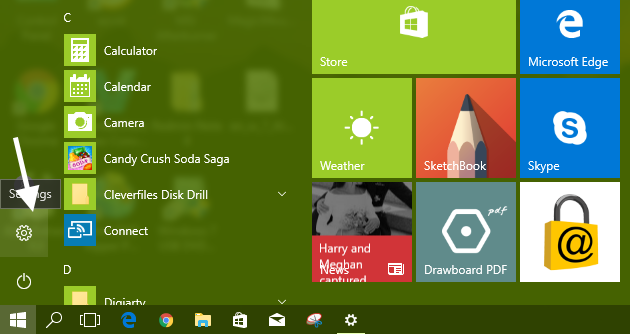
1. Click the Start button and go to Settings.
2. Select Update and Security.
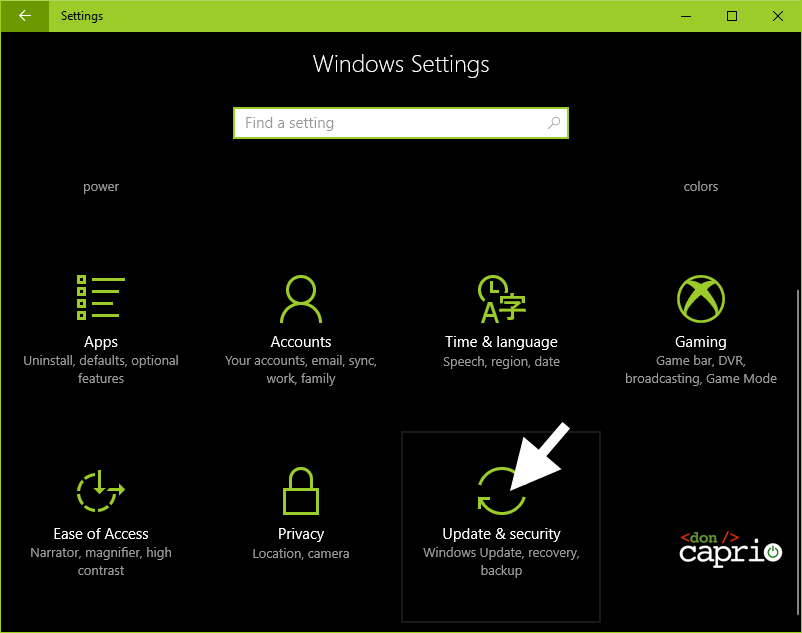
3. Click Windows Update, then Advanced Options.
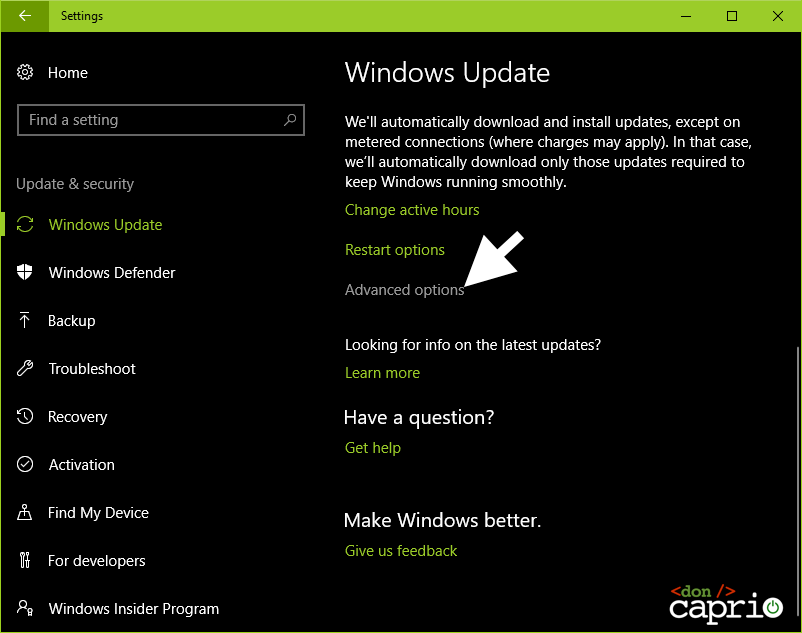
4. Click “Choose how updates are delivered“.
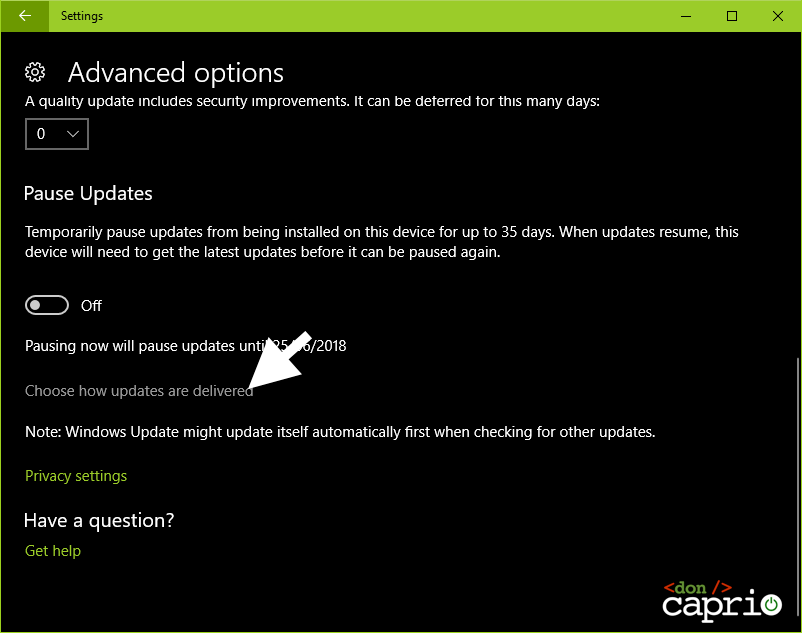
5. Turn off using the toggle.
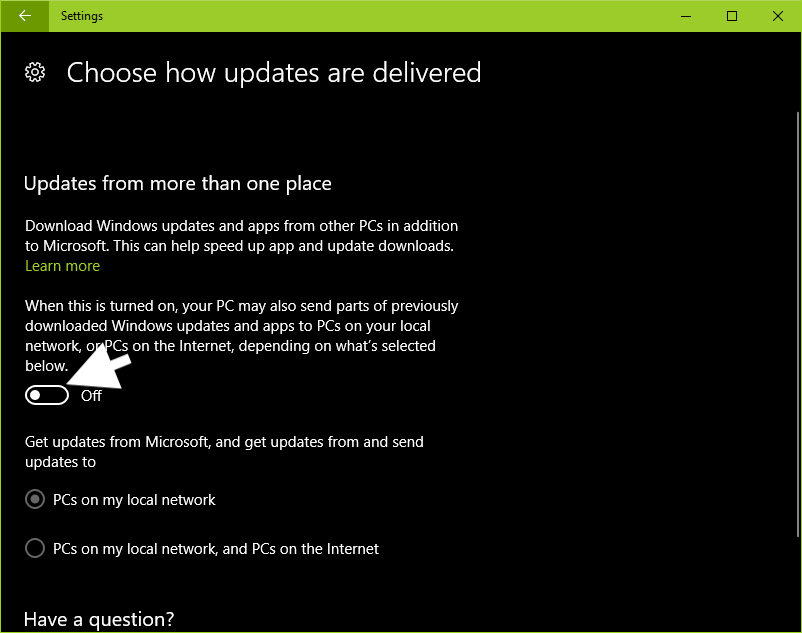
This should stop Windows from using your allocated bandwidth to update other people’s computers.
Block Windows update
This is an extreme measure which you shouldn’t take unless you know what you’re doing. Disabling Windows update totally stops you from getting security patches. If a new vulnerability is discovered in your operating system, you are not protected since you’ve blocked updates. If you still want to go ahead, follow these steps:
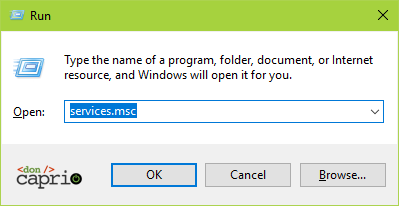
1. Press Windows button + R on your keyboard to start a run command
2. Type services.msc and hit Enter.
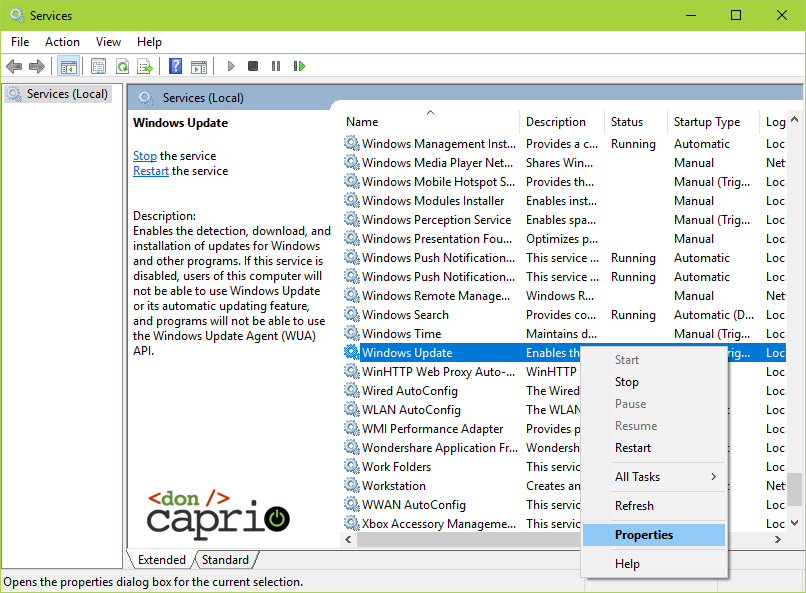
3. Scroll down till you see Windows Update. Right-click and choose Properties.
4. Under Startup type, select disabled:
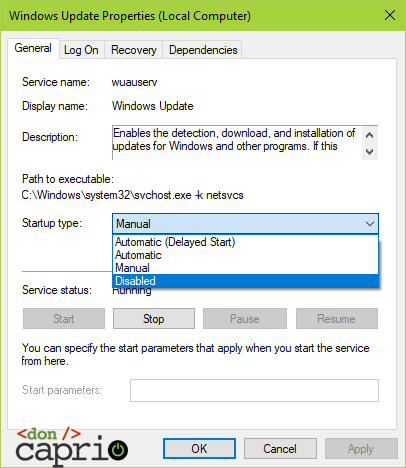
5. Click OK. Windows update service should no longer startup with your computer.
As mentioned before, this is not a very good idea. The better option is to launch Group Policy Editor and select Notify for download and notify for install. This lets you choose when to download and install updates. This second part of this previous post explains how to do this.
Install NetLimiter
If everything fails and your computer is still draining your allocated data and wrecking your internet subscription, you may have to monitor data usage with a program like NetLimiter. If you’ve ever used Little Snitch on macOS, NetLimiter is it’s equivalent on Windows.
NetLimiter is a firewall app that monitors incoming and outgoing connections through a simple user interface. It lets you easily block apps from accessing your internet connection. You can as well limit the download and upload speed.
There are times when the problem isn’t even from Windows update, but from other processes like wermgr.exe (Windows Error Reporting Manager), svchost.exe or even OfficeClicktoRun.exe.
To use NetLimiter:
1. Launch the program and identify the process you want to block.
2. Right-click on the program and select Add rule…
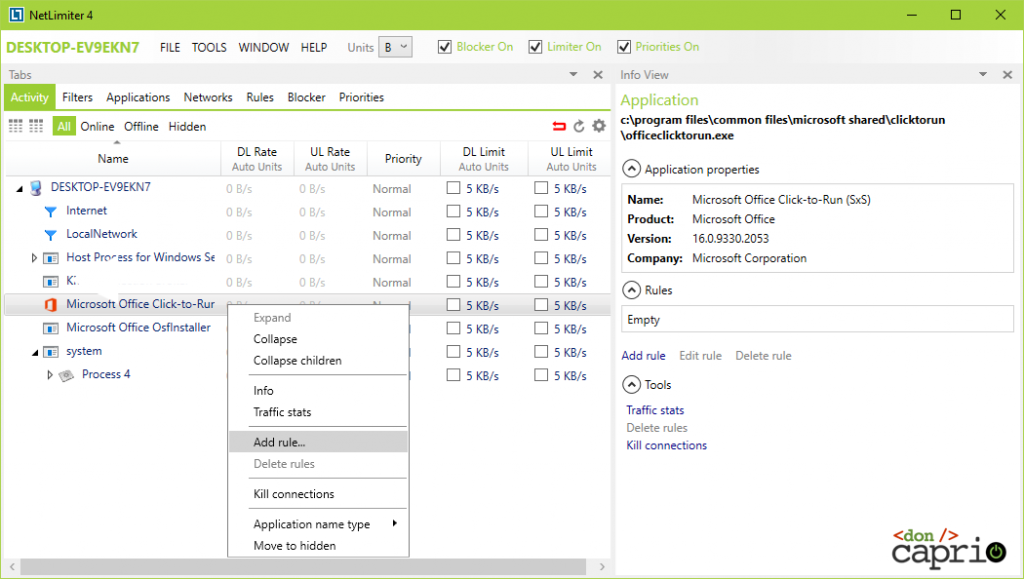
3. Select Firewall under Rule Type.
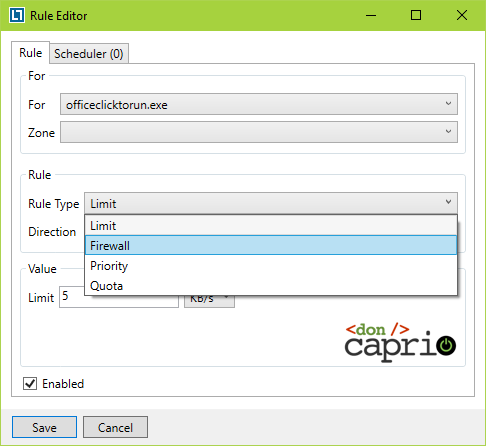
4. Under Firewall action, select Deny to block the process from accessing the Internet.

Be careful when using Netlimiter, don’t just go about blocking everything as you may shut your computer completely from accessing the Internet. Instead of completely blocking processes, you may also limit their upload and download speed to just 5KB/s.
Update: Using Task Scheduler to kill Windows update
According to a valid comment from IbukunOluwa, this works great as well:
- Find Task Scheduler.
- Click Task Scheduler Library > Microsoft > Windows.
- Locate:
–Background Intelligent Transfer > click > right-click on each task and disable it.
–Update Orchestrator > click > delete all tasks > delete folder.
–Windows Update > click > delete all tasks > delete folder. - Never be bugged by Windows Update again!


Comments
3 responses to “How to Stop Excessive Data Usage on Windows 10”