We’ve covered why you should root your phone on different posts and it would be redundant explaining it all over again in this article. For reference, please check this posts:
Disclaimer: Please note that you’re doing this at your own risk. I am not responsible for any damage arising from following this tutorial. Also, you may lose your warranty by rooting your device.
Also read: Innjoo Note pro Hands-on Review
Steps to Root your Innjoo Note Pro
1. Download and install Kingroot.
2. Be sure your phone is connected to the internet and launch the app. It’ll try to verify your root status first.
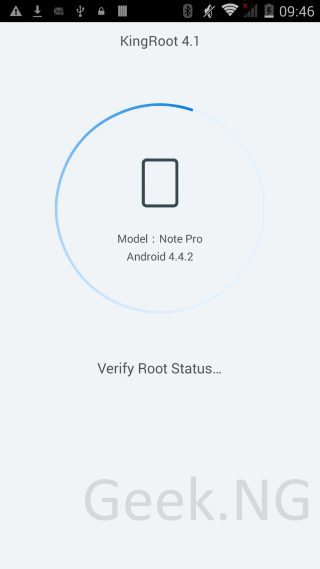
3. After trying to verify your root status, click the “START ROOT” button.

4. The rooting process should start and you should see something like this.
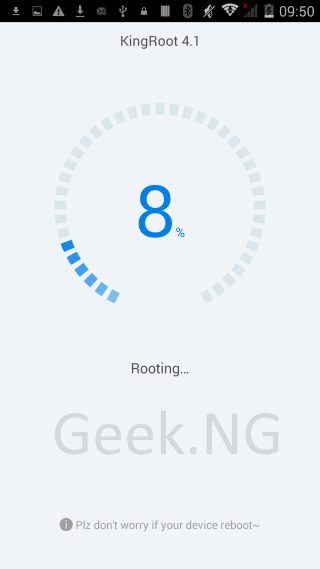
5. During this process, your phone may restart.
6. About a minute or two later, the whole process should be complete.
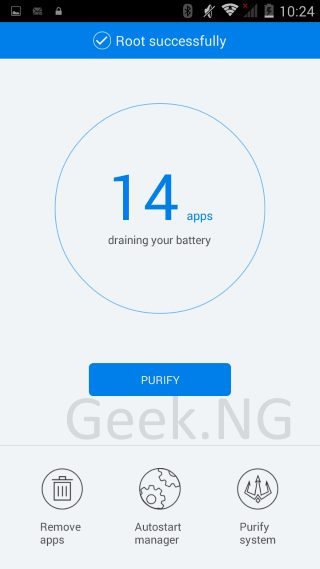
7. To verify if your phone is truly rooted, you can install root checker basic from Play Store or simple close the Kingroot app and re-launch. It should show you this.


If you check your app drawer too, a new application call Kinguser should be installed.


Comments
2 responses to “How to Root Innjoo Note Pro”